缓存静态文件

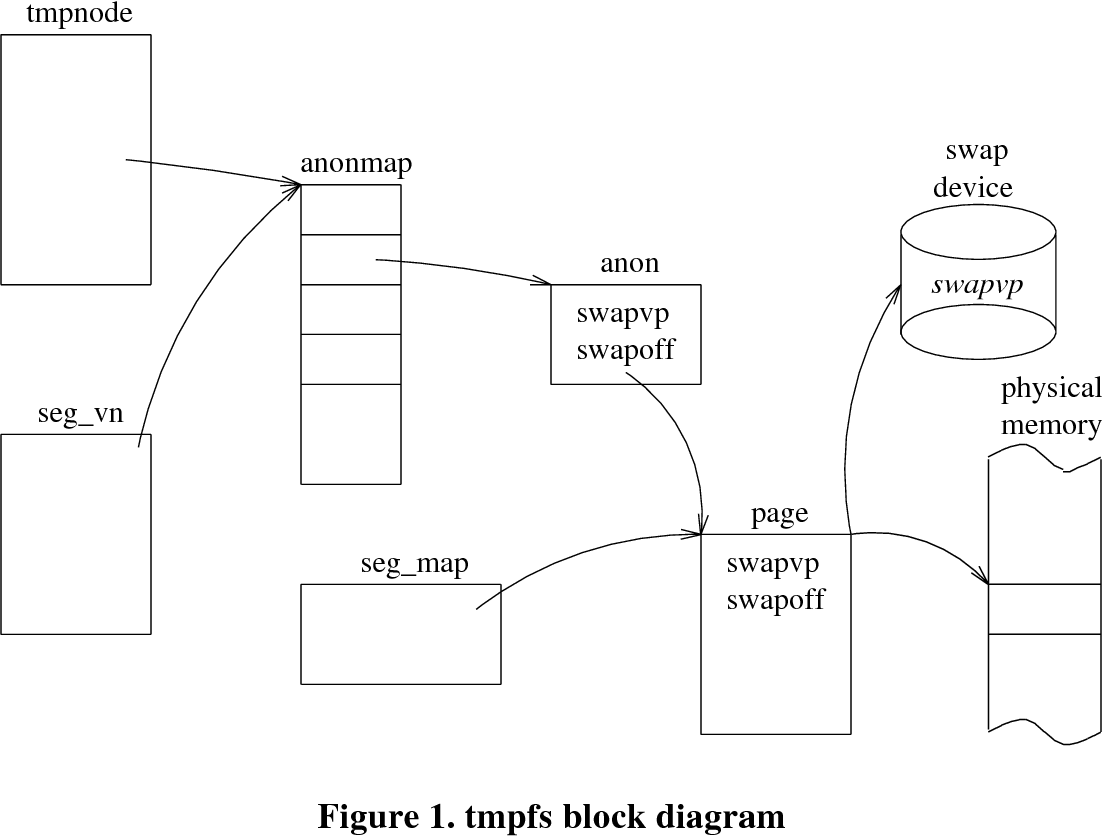
众所周知nginx有很强的分发静态文件的能力,很多时候nginx对静态资源分发能力的瓶颈和redis一样在主机的网卡上。 (一般虚拟机的网卡只有500mbps,如果你使用的是万兆的物理网卡就当我没说) 和redis对比,nginx有另外一个瓶颈在服务器的硬盘IO上,SSD硬盘情况会好一些, 所以很多情况下,我们会把 nginx的cache 做在系统的ssd硬盘上, 其实还可以直接把cache放到内存文件系统里,进一步提升磁盘io吞吐。 tmpfs differences between ramfs and tmpfs 1 2 3 4 5 #!/bin/bash mkdir /mnt/ramdisk mount -t tmpfs -o size=512m tmpfs /mnt/ramdisk echo 'tmpfs /mnt/ramdisk tmpfs nodev,nosuid,noexec,nodiratime,size=1024M 0 0' >> /etc/fstab nginx http cache config 1 2 3 4 5 6 http { more_set_headers 'Server: CachedLOL'; proxy_cache_path /var/cache/nginx levels=1:2 use_temp_path=on keys_zone=one:500m max_size=5g inactive=120m; proxy_temp_path /var/cache/nginx/tmp 1 2; } location conf 1 2 3 4 5 6 7 8 9 10 11 12 13 14 15 16 17 18 19 20 21 22 upstream upV1 { server 172.26.2.5:9090 fail_timeout=0; server 172.26.2.6:9090 fail_timeout=0; } server { listen 80 default backlog=16384; server_name tab.deoops.com; location ~* ( /static.*|/list.+|/ )$ { proxy_redirect off; proxy_cache one; proxy_ignore_headers "Set-Cookie"; proxy_hide_header "Set-Cookie"; add_header X-Cache $upstream_cache_status; proxy_cache_key $uri$is_args$args$mobile; proxy_cache_min_uses 1; proxy_cache_valid 120m; proxy_cache_use_stale error timeout; proxy_buffering on; proxy_pass http://upV1; }

April 29, 2017 · datewu

安装配置openvpn

开发需要能调用facebook的接口,我们运维这边需要配置一台测试服务器能访问facebook,用shadowsocks 和squid 代理,性能不够好。所以决定上openvpn。 简单记录下openVPN的安装配置过程,服务端和客户端使用的操作系统均是centos 7。 服务端 安装 1 2 3 #!/bin/bash yum install epel-release -y yum install openvpn openssl -y 自签名证书 使用openssl工具生产自签名的ca,证书,client.key,并把这些证书传给客户端: 1 2 3 4 5 6 7 8 9 10 11 12 13 14 15 16 17 18 19 20 21 22 23 24 25 26 #!/bin/bash ### CA openssl dhparam -out /etc/openvpn/dh.pem 2048 openssl genrsa -out /etc/openvpn/ca.key 2048 openssl req -new -key /etc/openvpn/ca.key -out /etc/openvpn/ca.csr -subj /CN=OpenVPN-CA/ openssl x509 -req -in /etc/openvpn/ca.csr -out /etc/openvpn/ca.crt -signkey /etc/openvpn/ca.key -days 3650 echo 01 > /etc/openvpn/ca.srl chmod 600 /etc/openvpn/ca.key ### Server openssl genrsa -out /etc/openvpn/server.key 2048 openssl req -new -key /etc/openvpn/server.key -out /etc/openvpn/server.csr -subj /CN=OpenVPN/ openssl x509 -req -in /etc/openvpn/server.csr -out /etc/openvpn/server.crt -CA /etc/openvpn/ca.crt -CAkey /etc/openvpn/ca.key -days 3650 chmod 600 /etc/openvpn/server.key ### Client openssl genrsa -out /etc/openvpn/client.key 2048 openssl req -new -key /etc/openvpn/client.key -out /etc/openvpn/client.csr -subj /CN=OpenVPN-Client/ openssl x509 -req -in /etc/openvpn/client.csr -out /etc/openvpn/client.crt -CA /etc/openvpn/ca.crt -CAkey /etc/openvpn/ca.key -days 3650 chmod 600 /etc/openvpn/client.key ### 把clinet的证书私钥和ca正式传给客户端 scp /etc/openvpn/ca.crt /etc/openvpn/client.crt /etc/openvpn/client.key client: 配置 服务端配置文件: 1 2 3 4 5 6 7 8 9 10 11 12 13 14 15 16 17 18 19 20 21 22 # /etc/openvpn/server.conf server 10.8.0.0 255.255.255.0 verb 3 key /etc/openvpn/server.key ca /etc/openvpn/ca.crt cert /etc/openvpn/server.crt dh /etc/openvpn/dh.pem keepalive 10 120 persist-key persist-tun comp-lzo push "redirect-gateway def1 bypass-dhcp" push "dhcp-option DNS 8.8.8.8" push "dhcp-option DNS 8.8.4.4" user nobody group nogroup proto udp port 1194 dev tun1194 status openvpn-status.log kernel iptables 打开服务器路由配置: ...

February 20, 2017 · datewu

Ansible

本文不定期更新 :) A system administrator’s guide to getting started with Ansible ad-hoc 管理集群的时候,常常来不及写playbooks,只需要执行一些ad-hoc查看某些主机的状态, 或者批量修改/上传配置文件到某些主机。 1 2 ansible all -m copy -a \ 'src=dvd.repo dest=/etc/yum.repos.d owner=root group=root mode=0644' -b playbook 1 ansible-playbook -i prod_hosts demo.yml --skip-tag downloaded host file 1 2 3 4 5 6 7 [api] tt ansible_host=test tt3 ansible_host=test3 tt8 ansible_host=test8 [db] pg1 ansible_host=db88 pg2 ansible_host=db98 task 1 2 3 4 5 6 7 8 9 10 11 12 13 14 15 16 17 18 19 20 21 22 23 24 25 26 27 28 29 30 31 32 33 34 35 36 37 38 # demo.yml --- - hosts: db vars: tar_src: "tars/postgres_exporter_v0.4.1_linux-amd64.tar.gz" tar_dest: "/usr/bin/" service_src: "services/postgres_exporter.service" service_dest: "/usr/lib/systemd/system/" # works on centos; ubuntu is '/etc/systemd/system/ tasks: - debug: var=ansible_default_ipv4.address - name: untar to /usr/bin unarchive: src: "{{ tar_src }}" dest: "{{ tar_dest }}" become: true - name: download and untar prometheus tarball tags: downloaded unarchive: src: "{{ prometheus_tarball_url }}" dest: "{{ prometheus_install_path }}" copy: no - name: copy service file copy: src: "{{ service_src }}" dest: "{{ service_dest }}" become: true - name: ensure node_export is ebalbe and running systemd: name: postgres_exporter enabled: yes daemon_reload: yes state: started become: true

April 16, 2016 · datewu

tcp性能调优

我们一般会调整内核tcp参数以提高web服务器(比如ngin)的性能。 sysctl 加载Linux 内核配置 1 sysctl -p /etc/sysctl.d/xxx-xxx.conf meat 1 2 3 4 5 6 7 8 9 10 11 12 13 14 15 16 17 18 19 20 21 22 23 24 # /etc/sysctl.d/00-network.conf # Receive Queue Size per CPU Core, number of packets # Example server: 8 cores net.core.netdev_max_backlog = 4096 # SYN Backlog Queue, number of half-open connections net.ipv4.tcp_max_syn_backlog = 32768 # Accept Queue Limit, maximum number of established # connections waiting for accept() per listener. net.core.somaxconn = 65535 # Maximum number of SYN and SYN+ACK retries before # packet expires. net.ipv4.tcp_syn_retries = 1 net.ipv4.tcp_synack_retries = 1 # Timeout in seconds to close client connections in # TIME_WAIT after receiving FIN packet. net.ipv4.tcp_fin_timeout = 5 # Disable SYN cookie flood protection net.ipv4.tcp_syncookies = 0 # Maximum number of threads system can have, total. # Commented, may not be needed. See user limits. #kernel.threads-max = 3261780 # Maximum number of file descriptors system can have, total. # Commented, may not be needed. See user limits. #fs.file-max = 3261780

April 5, 2016 · datewu

再见scripttogr👋

很久以前有幸遇到一款很干净简洁 blog saas产品,可以通过email和dropbox写/备份文章。 今天发现scripttogr 已经关闭不运营了。 可惜了。 好的产品不一定能活下去,可惜了。

July 13, 2015 · datewu

脚本注入

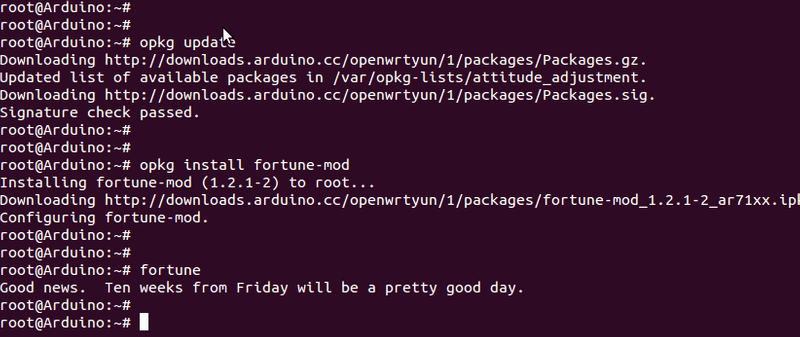
使用opkg安装软件时,常常需要对候软件包进行初始化或者自定义化操作,这种开发需求一般写给shell脚本就可以对付了。 现在的问题是当这些脚本多了之后,原作者也不愿意修改安装包,我们怎么分发这些自定义的脚本,能不能把自定义的这些脚本编译到opkg包里? 位置 把本地的shell脚本放在openwert 仓库的这个目录,编译openwrt的时候就会被打包到对应opkg二进制文件中: 1 2 /barrier_breaker/package/package-abc # package makefile文件所在 package-abc/files # shell脚本放置目录 步骤 修改Makefile 在package目录下任意找一个package目录,比如chinadns, 然后修改Makefile文件。 在install语句后添加 : 1 $(INSTALL_BIN) ./files/your_script.sh $(1)/etc/config/your_script.sh 放置脚本 将脚本your_script.sh放置在files目录下; 选择opkg 在make menuconfig 图像界面中选择修改过的包(chinadns) 附 package 和注入文件相关的部分makefile代码: 1 2 3 4 5 6 7 8 9 10 11 12 13 14 15 16 17 18 19 20 21 22 23 24 25 26 27 28 29 30 31 32 33 34 35 36 37 38 39 ## include $(TOPDIR)/rules.mk PKG_NAME:=xxx PKG_RELEASE:=1 PKG_SOURCE:=$(PKG_NAME)-$(PKG_VERSION).tar.gz PKG_SOURCE_URL:=https://github.com/xxx/releases/download/v$(PKG_VERSION) PKG_MD5SUM:=f772a750580243cfxcsfd2xc39d7b9171b1 PKG_BUILD_DIR:=$(BUILD_DIR)/$(PKG_NAME) include $(INCLUDE_DIR)/package.mk ## define Package/xxx SECTION:=net CATEGORY:=Network TITLE:=xxx endef ### define Package/xxx/description button haha upgrade. endef ### #define Package/xxx/conffiles #/etc/config/system #/etc/hotplug.d/button/00-button #endef ### define Package/wps_button/install #$(INSTALL_DIR) $(1)/etc/init.d $(INSTALL_BIN) ./files/xxx $(1)/etc/config/xxx #$(INSTALL_DATA) ./files/system.conf $(1)/etc/config/system endef ### $(eval $(call BuildPackage,xxx)) ##

June 18, 2015 · datewu

字符串

运维人员/系统管理员每天要在终端敲入大量命令,也要修改查看大量文本配置文件,日志信息。 甚至可以夸张一点说Linux/Unix system admin的全部工作就是和字符串打交道。 binary 大家都知道文本文件是字符串组成的,其实二进制文件里面其实也包含了很多字符串: 1 2 3 4 5 6 7 8 9 10 11 12 13 14 ➜ infra-api git:(dev) file infra-api infra-api: Mach-O 64-bit executable x86_64 ➜ infra-api git:(dev) strings infra-api | head flag hash mime path sort sync time *int AAAA Addr ➜ infra-api git:(dev) 命令 收集一些常用的shell 字符串操作命令 cut 1 2 3 4 5 6 7 8 9 10 11 12 13 14 15 16 ❯ tldr cut Cut out fields from stdin or files. More information: https://www.gnu.org/software/coreutils/cut. - Cut out the first sixteen characters of each line of stdin: cut -c 1-16 - Cut out the first sixteen characters of each line of the given files: cut -c 1-16 file - Cut out everything from the 3rd character to the end of each line: cut -c 3- - Cut out the fifth field of each line, using a colon as a field delimiter (default delimiter is tab): cut -d':' -f5 - Cut out the 2nd and 10th fields of each line, using a semicolon as a delimiter: cut -d';' -f2,10 - Cut out the fields 3 through to the end of each line, using a space as a delimiter: cut -d' ' -f3- cat/less cat,主要有三大使用场景: ...

May 17, 2015 · datewu

增加固件大小

很多路由器的flash容量只有4m大,所以绝大多数openwrt固件也是4m大小。 当我们手动改造路由器加大flash容量后,可以调整openwrt默认设置使得编译出来的factory可以有8m的大小, 从而安装更多的内置软件。 本文以wr703n路由器 为例子,简单介绍一下如何加大固件的容量,让我们预安装更多内置软件。 查看 1 2 3 # ./tools/firmware-utils/src/mktplinkfw.c fw_max_len为0xfc0000,16M flash fw_max_len为0x7c0000,8M flash 修改 1 2 3 # ./target/linux/ar71xx/image/Makefile # 将703n的4Mlzma改为8Mlzma或16Mlzma $(eval $(call SingleProfile,TPLINK-LZMA,$(fs_64kraw),TLWR703,tl-wr703n-v1,TL-WR703N,ttyATH0,115200,0x07030101,1,8Mlzma))

May 7, 2015 · datewu

刷机HG255d

交叉编译 在ubuntu下安装编译工具(gcc,xmllib,cmake, git 等); git克隆openwrt仓库:git clone git://git.openwrt.org/14.07/openwrt.git; 自定义kernel target: 源代码做两处修改 : 1 2 3 target/linux/ramips/image/Makefile /base-files/lib/ramips.sh target/linux/ramips/base-files/lib/preinit/06_set_iface_mac 在弹出的make menuconfig 图像界面中选择cpu型号; 打开vpn开始编译固件。 结果 交叉编译完成后,根据上一步选择的安装包的多少,bin目录下会生成对应的opkg包,和固件: factory文件,可以称作底包; sysupgrade文件,可以称作升级包; web/uboot烧录刷机 接通路由器电源,按住WPS按钮不放,然后按电源键开机, power LED快闪即松开WPS键,此时路由器已加入升级模式; 访问路由器web地址(如:http://192.168.1.1), 按照web界面提示选取factory文件完成固件烧录刷机; ssh/ftp 烧录 可以直接执行sysupgrade命令烧录估计: 1 2 3 4 5 ssh-keygen -f "/home/openwrt-qqm/.ssh/known_hosts" -R 192.168.1.1 #可以省略此条命令 scp xxxxxx-squashfs-sysupgrade.bin [email protected]:/tmp/ ssh [email protected] cd /tmp/ sysupgrade -n xxxxxxxxxxx-sysupgrade.bin opkg 烧录完系统固件后,可以使用opkg安装软件包,比如china-dns, shadowsocks, openvpn,等等。

March 17, 2015 · datewu

Google Domain

刚刚在google+上看到google 推出了自己的域名注册服务,截两张图,纪念下。 google推广自己的 com.google 域名注册托管服务,把首页变成了镜像模式 搜索正常,不过搜索结果也使用了镜像效果:

June 17, 2014 · datewu